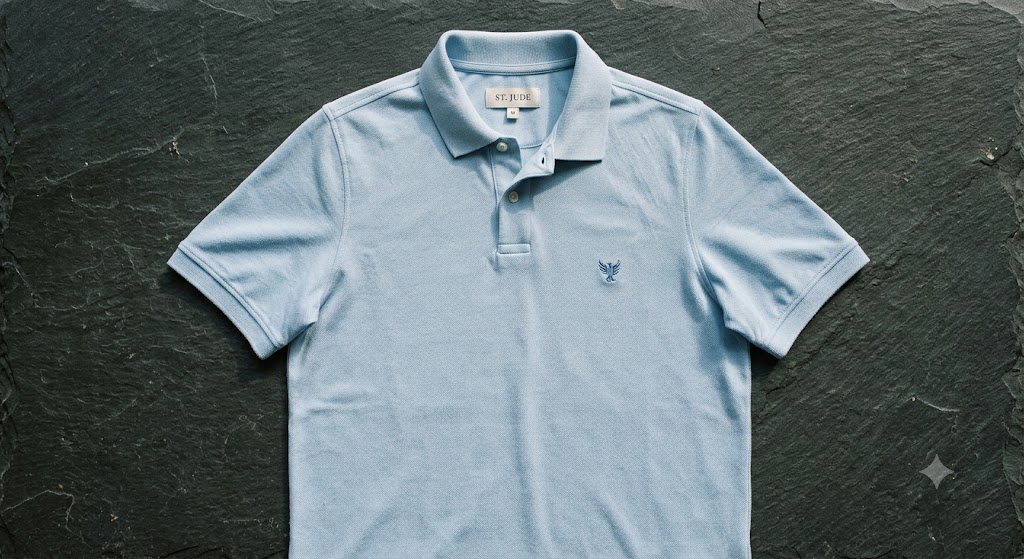
This is a complete, illustrated sew-along for a buttoned polo — built around the exact pattern Maelo's polo modeler exports. Every stage references the real cut pieces (Body Front, Body Back, Sleeve, Collar, Collar Stand, Placket and Sleeve Binding) and the marks the pattern carries: ⊕ button positions, "I" buttonhole slits, notches, fold lines, and the side-slit notch. It is metric-first, with imperial in brackets.
At a glance
- Difficulty: intermediate — the placket and collar reward patience.
- Time: roughly 3–4 hours once pieces are cut.
- Seam allowance: 1 cm (3/8") throughout — Maelo's patterns are drawn with a 1 cm allowance and a separate red cutting line.
- Stitch & needle for knit polos: a ballpoint/jersey needle, a narrow zigzag or a 3-thread overlock for seams, and a twin needle or zigzag for hems. For woven piqué, a straight stitch is fine.
- Press as you go. Most of the "clean factory finish" in a polo is pressing, not stitching.
Tools & materials
- Your cut pieces — export them from the polo modeler's ✂ Pattern view ("Cut on fold" for the body pieces).
- Main fabric; matching thread. Cotton piqué (woven) is the classic polo fabric — use a straight stitch and lightweight woven fusible. Jersey piqué or performance knit (both stretch fabrics) are common for sport and casual polos — switch to a ballpoint needle, narrow zigzag, and knit fusible if interfacing.
- Buttons — the quantity matches the modeler's Buttons slider (typically 2–3).
- Optional fusible interfacing. A knit fusible on the placket and collar gives a crisper, more structured look — recommended for woven piqué, optional (often skipped) for a soft jersey polo. Maelo's pattern is drawn main-fabric-only, so interfacing is a finish choice, not a required piece.
1 · Front placket
The placket is the trickiest part, so do it first while the front is still flat. Maelo's Placket piece carries a lengthwise centre fold line, the ⊕ button marks on one half and the "I" buttonhole slits on the other — those tell you which side becomes the button side and which the buttonhole side.
- If you're using interfacing, fuse it to the placket pieces now, following the manufacturer's instructions.
- On the Body Front, the centre-front opening is marked for you. Mark a small triangle at the base of the opening: about 1.3 cm (1/2") either side of centre, and 1.3 cm (1/2") up from the bottom of the cut line, as in Fig. 2.
- Fold each placket along its fold line and stitch 1.5 cm (5/8") from the top edge. Turn right side out, finish the long raw edges, and press.
- On the right side of the garment, pin the plackets to the opening edges, matching the marks. Stitch at 1 cm from the top edge down to the bottom mark.
- Keeping the placket allowances clear, cut along the centre line up to the tip of the triangle, then clip the two slanted sides — leave the short bottom edge attached.
- Turn the plackets and the little triangle to the inside, folding on the fold lines. Overlap the plackets (button side over buttonhole side) and press.
- Turn the bodice to the wrong side to expose the triangle and the placket ends, and stitch them together. Press.
- Work the buttonholes on the buttonhole side at the "I" marks, and sew the buttons on the button side at the ⊕ marks.
2 · Shoulder seams
With right sides together, pin Body Front to Body Back at the shoulders. Stitch a double-stitched seam (a second row just inside the first) for strength, finish the allowances together, and press them towards the back.
3 · Collar and collar stand
The collar is two layers stitched and turned; the stand is the band that lifts it off the neckline. If you're interfacing, fuse the wrong side of the collar (and optionally the stand) first.
- With right sides together, pin the two Collar sections, matching notches, and stitch around the outer edge. Trim the corners to about 2 mm from the stitching to reduce bulk.
- Turn the collar right side out and press crisply.
- Pin one Collar Stand to the collar, right sides together, matching notches, and baste.
- Press the lower edge of the outer stand section up by the seam allowance to keep it clean.
- Pin the outer stand to the collar so the collar is sandwiched between the two stand pieces, then stitch. Turn right side out and press.
- Pin the lower edge of the stand to the neckline, matching notches and clipping the garment's neck curve where needed. Stitch, keeping the pressed inner edge free.
- Turn right side out, tuck the allowances into the stand, and press. For a classic finish, "stitch in the ditch" along the neckline seam to catch the inner stand. Add the top buttonhole and button at the marks.
4 · Set the sleeves
Polo sleeves are set in flat at this stage, before the side seams close. The Sleeve piece carries a centre-cap notch that matches the shoulder seam.
- With right sides together, pin a sleeve to the armhole, matching notches and lining the centre-cap notch up with the shoulder seam. Baste, then stitch.
- Stitch again 6 mm (1/4") inside the first row, then serge or zigzag the allowances together and press towards the sleeve.
5 · Side seams and underarm
Now close each side in one pass. If you generated the polo with side slits, the side seam stops at the slit notch — leave the vent open below it.
- With right sides together, pin Front to Back at the sides and pin the sleeve underarm edges together.
- Stitch one continuous seam from the sleeve opening, through the underarm, down to the slit notch. Reinforce the underarm curve with a second pass.
- Finish the allowances together and press towards the back.
6 · Sleeve binding
If your polo has ribbed/bound sleeve openings (the Sleeve Binding piece only appears when the sleeve has a binding), finish them now.
- Fold the Binding in half, right sides together, and stitch the short edge into a loop. Press the seam open.
- Fold the loop in half lengthwise, wrong sides together, and press.
- Pin the binding's raw edges to the right side of the sleeve opening, matching notches, and stitch — a narrow zigzag or overlock works best on knits.
- Turn right side out and press.
7 · Hem and side slits
Finally, the bottom hem. The body pieces carry a hem fold line; if you chose a back drop in the modeler, the back simply hangs a little longer — hem both to their own fold lines.
- Turn the hem up along the fold line and press. Topstitch with a twin needle from the right side, or zigzag, all the way round.
- At each side slit, make a narrow 1.5 cm (5/8") hem on the opening edges. When you reach the top of the slit, pivot across the seam allowance 6 mm (1/4") above the notch so the corner is reinforced and square.
Give the finished polo a finishing press — collar, plackets, sleeve openings, and hem. Those four pressed details are what separate a polo that looks home-made from one that looks bought.